
The 5 Best Portable Monitors for College Students (Dual Screen Setup Guide)
The college experience is a masterclass in multitasking. You’re toggling between Zoom lectures, research papers, course readings, and—let’s be honest—a dozen browser tabs. Your laptop screen, no matter how good, is the bottleneck. The solution? A high-quality portable monitor. Within the first 10% of this article, we’ll establish that a portable second screen is no longer a luxury but an essential tool for maximizing academic productivity. Studies show that a dual-monitor setup can boost productivity by over 40%, making it the single most effective hardware upgrade a student can make.
In this expert review, we’ll break down the five best models for students, covering everything from premium creator displays to budget-friendly workhorses. We’ll also provide a step-by-step guide to setting up your perfect dual-screen mobile workstation.
💻 The 5 Best Portable Monitors Reviewed for College Life
Whether you’re in a cramped dorm room, the library, or a busy coffee shop, your workspace needs to be flexible, powerful, and easy to pack. Our top picks cater to different student needs and budgets, ensuring you find the perfect partner for your laptop.
| Rank | Pick Category | Model | Key Feature for Students | Approx. Price Range |
| 1 | Top Pick (Creator/STEM) | SOTSU FlipAction Pro 16″ Gen2 | 120Hz Refresh, 100% DCI-P3 Color | Premium |
| 2 | Budget Pick | Arzopa A1/Z1RC Portable Monitor | Best Balance of Size & Price (15.6”/16”) | Budget |
| 3 | Best for Portability | Dell Pro 14 Plus Portable Monitor | Ultra-lightweight and Bright (14”, 400 Nits) | Mid-Range |
| 4 | Best for Touchscreen & Versatility | Lenovo ThinkVision M14t Gen2 | Touch, Stylus Support, 16:10 Aspect Ratio | Mid-to-High |
| 5 | Best for Gaming/Media | NexiGo NG17FGQ Portable Gaming Monitor | 300Hz Refresh Rate (17.3”) | Premium |
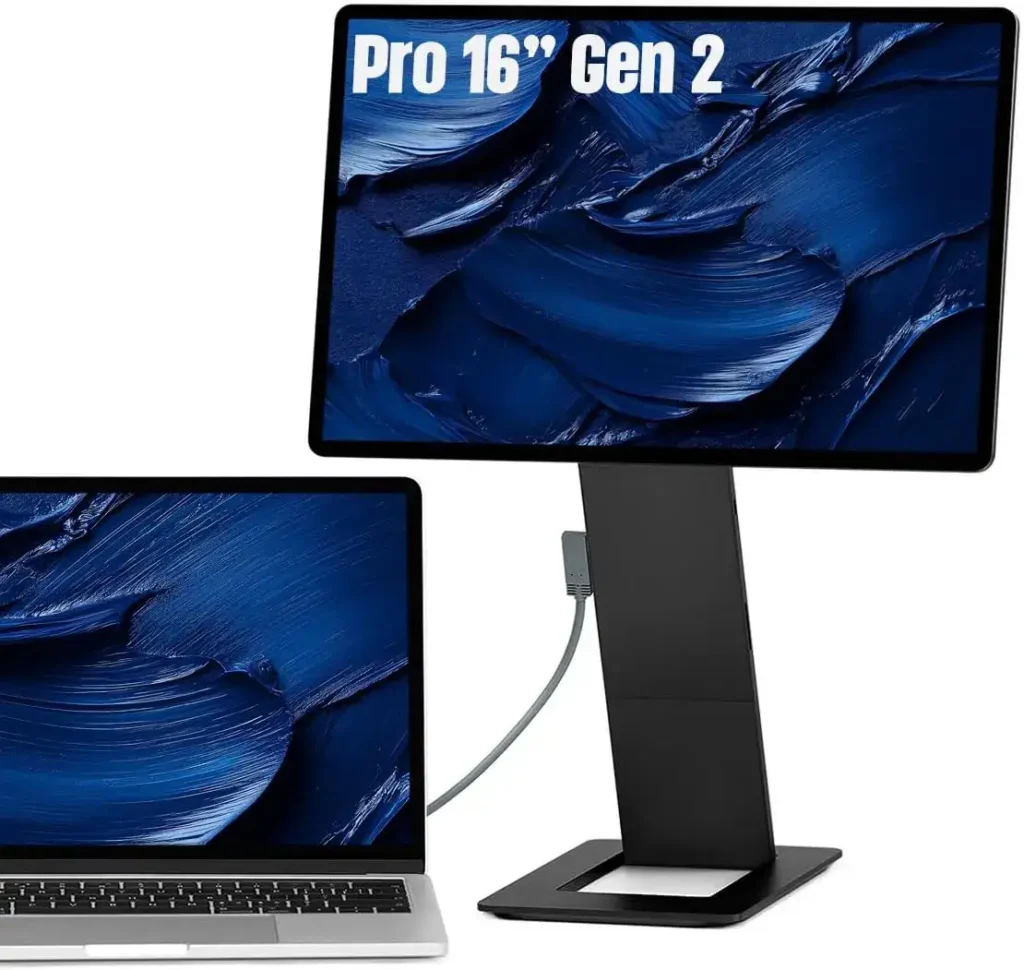
1. Top Pick: SOTSU FlipAction Pro 16″ Gen2 Premium Portable Monitor (Universe Black)
The SOTSU FlipAction Pro 16″ Gen2 is a premium tool designed for the student who needs professional-grade performance on the go—think Graphic Design, Video Editing, or complex Engineering programs. Its full metal CNC chassis and unique integrated kickstand set it apart from basic folio-style monitors. This is the closest you can get to a desktop display experience in a backpack.
Product Specs:
- Screen Size/Aspect: 16 inches / 16:10
- Resolution/Refresh: 2560×1600 (QHD+) / 120Hz
- Color Gamut: 100% DCI-P3
- Brightness: 400 Nits
- Unique Feature: Pivot Rotate Functionality & MST (Multi-Stream Transport) Support for daisy-chaining multiple screens.
| Pros | Cons |
| Outstanding Build Quality: Full metal CNC chassis feels incredibly premium and durable. | Premium Price Tag: Significantly more expensive than basic models. |
| Creator-Grade Display: 100% DCI-P3 color gamut and QHD+ resolution are perfect for accurate color work. | No Built-in Battery/Speakers: Relies entirely on USB-C power from the laptop. |
| 120Hz Refresh Rate: Provides a noticeably smoother visual experience for scrolling, media, and light gaming. | No Touchscreen: Purely a viewing monitor; you must use a keyboard/mouse/trackpad. |
| Superior Ergonomics: Integrated, rotating stand allows for both portrait and landscape orientation at a comfortable height. | Mac Scaling: May require third-party software (like BetterDisplay) for optimal macOS scaling. |
2. Budget Pick: Arzopa A1/Z1RC Portable Monitor
For the student whose main goal is simply to have a second screen for notes, reference materials, and spreadsheets, the Arzopa models deliver exceptional value. They provide a large, functional screen without the high-end bells and whistles that inflate the price.
Product Specs (Z1RC – the 16″ model):
- Screen Size/Aspect: 16 inches / 16:10
- Resolution/Refresh: 2560×1600 (QHD+) / 60Hz
- Color Gamut: Standard sRGB
- Brightness: 400 Nits
- Unique Feature: Excellent high resolution (2.5K) at a rock-bottom price point.
| Pros | Cons |
| Aggressive Price Point: Easily the most affordable option for the screen size and resolution. | Flimsy Case-Stand: The magnetic folio cover/stand is functional but less stable than integrated stands. |
| Lightweight & Slim: Easy to slip into any backpack and barely adds weight to your everyday carry. | Standard 60Hz: Not ideal for fast-paced gaming or very smooth scrolling. |
| Great Connectivity: Includes dual USB-C (power/data) and Mini-HDMI inputs for maximum compatibility. | Color Accuracy: Good for general work but not reliable for professional creative work. |
3. Best for Portability: Dell Pro 14 Plus Portable Monitor (P1425)
The Dell Pro 14 Plus is built for the “digital nomad” student—the one who is constantly moving from the library to the quad to the dorm room. It prioritizes a high-quality, bright display in the smallest, lightest form factor possible, sacrificing screen size for ultimate packability.
Product Specs:
- Screen Size/Aspect: 14 inches / 16:10
- Resolution/Refresh: 1920×1200 (WUXGA) / 60Hz
- Color Gamut: 100% sRGB
- Brightness: 400 Nits (Easily the brightest non-OLED monitor tested)
- Unique Feature: Built-in, foldable stand that rests flush against the device, making it incredibly thin.
| Pros | Cons |
| Feather-Light: Weighs just 1.36 lbs, making it almost unnoticeable in a backpack. | Smaller Screen: At 14 inches, it offers less screen real estate than 15.6″ or 16″ models. |
| Exceptional Brightness: 400 nits is brilliant for use in bright libraries or well-lit classrooms, reducing glare. | Limited Ports: Only two USB-C ports (no HDMI or Mini-HDMI). |
| Superior Contrast/Color: Excellent display quality that rivals premium non-portable desktop monitors. | No Touch Support: Strictly a viewing display. |
4. Best for Touchscreen & Versatility: Lenovo ThinkVision M14t Gen2
For students in collaborative or design-heavy courses, the ThinkVision M14t Gen2 is the perfect blend of functionality and portability. Its touch-enabled screen and included stylus are invaluable for annotating PDFs, sketching out ideas, or giving interactive presentations during group projects.
Product Specs:
- Screen Size/Aspect: 14 inches / 16:10
- Resolution/Refresh: 2240×1400 (WQHD+) / 60Hz
- Color Gamut: Full sRGB Coverage
- Brightness: 300 Nits
- Unique Feature: 10-point multi-touch support and included pressure-sensitive active stylus.
| Pros | Cons |
| Touchscreen/Stylus: Dramatically improves workflow for drawing, annotation, and detailed tasks. | Price/Performance: Higher price than non-touch monitors with similar specs. |
| Excellent Ergonomics: Features a sturdy, hinged stand that allows for a wide range of tilt and height adjustment. | Lower Brightness: 300 nits is sufficient but noticeably dimmer than the Dell or SOTSU picks. |
| 16:10 Aspect Ratio: Provides more vertical screen space, ideal for reading documents and long spreadsheets. | 14-inch Size: Like the Dell, it sacrifices some size for enhanced portability. |
5. Best for Gaming/Media: NexiGo NG17FGQ Portable Monitor
While the focus keyword is student productivity, college life also includes downtime. For the gamer, computer science major, or film student who demands the highest frame rates and largest screen, the NexiGo NG17FGQ is a powerhouse. Its blazing 300Hz refresh rate is overkill for a research paper but a game-changer for competitive esports or fluid video playback.
Product Specs:
- Screen Size/Aspect: 17.3 inches / 16:9
- Resolution/Refresh: 1920×1080 (FHD) / 300Hz
- Color Gamut: Standard sRGB
- Brightness: 300 Nits
- Unique Feature: 300Hz Refresh Rate and 3ms Response Time—professional gaming territory.
| Pros | Cons |
| Unmatched Fluidity: The 300Hz refresh rate is ideal for high-motion content and competitive gaming. | Lower Resolution: Only 1080p, which can look less sharp than QHD+ models on a 17.3-inch screen. |
| Largest Screen: 17.3 inches provides maximum screen real estate for immersive media consumption. | Less Portable: It’s heavier (2.1 lbs) and significantly larger than other monitors on this list. |
| Excellent Connectivity: Includes both USB-C and HDMI for connecting to PCs, consoles, and streaming sticks. | Niche Focus: The extreme refresh rate is largely wasted on standard productivity tasks like essay writing. |
📚 Portable Monitor Buyer’s Guide: What Every College Student Needs to Know
Choosing the right second screen isn’t just about the display quality; it’s about matching the monitor’s features to your academic lifestyle. Here are the four critical factors that must influence your final decision:
1. Connectivity: The Single-Cable Solution
The goal of a portable setup is simplicity. The best monitors rely on a single USB-C cable that handles both power and video signal (using DisplayPort Alt Mode).
- Check Your Laptop: Ensure your laptop’s USB-C or Thunderbolt port supports DisplayPort Alt Mode and can deliver at least 15W of power. Most modern laptops do.
- Alternative Ports: If your laptop is older, you will need a dual setup: a video cable (Mini-HDMI or HDMI) and a separate power cable (USB-C or USB-A). Always check for both options.
2. Size, Resolution, and Aspect Ratio
The sweet spot for a student is a balance between screen real estate and backpack space.
- Size (14″ vs. 15.6″/16″):
- 14-inch: Best for extreme portability, matching many smaller laptops (Dell Pro 14, ThinkVision M14t).
- 15.6/16-inch: The most common size, offering a desktop-like experience (SOTSU, Arzopa).
- Resolution (FHD vs. QHD+):
- FHD (1920×1080): Standard, cost-effective, and perfectly adequate for text, notes, and browsing.
- QHD+ (2560×1600): Superior sharpness and color accuracy, a must-have for photo/video editing, CAD, or complex code.
- Aspect Ratio (16:9 vs. 16:10): A 16:10 monitor (like the SOTSU or ThinkVision) gives you more vertical space, which is a massive advantage when reading documents or scrolling through web pages.
3. Ergonomics and Stand Design
Unlike traditional monitors, portable monitors don’t have VESA mounts. Their stand design is critical for usability.
- Integrated Stands: Models like the SOTSU or ThinkVision have hinged, aluminum stands that lift the monitor to an ergonomic height, reducing neck strain—a huge win for long study sessions.
- Folio/Magnetic Stands: These are thinner and lighter but offer limited height adjustment and can feel wobbly on crowded or uneven surfaces (common in lecture halls).
- Portrait Mode: For students who code or read legal documents, a stand that allows the monitor to be easily rotated to portrait mode (like the SOTSU) is a game-changer for viewing lines of text or code.
4. Battery Life and Brightness
- Built-in Battery: Monitors with internal batteries (not covered in our top 5) eliminate the power draw from your laptop, but they increase the monitor’s weight and thickness. They are ideal if you know you’ll be away from a power outlet for 4+ hours.
- Brightness (Nits): Aim for at least 300 nits. If you frequently study in bright common areas, a 400-nit model (like the SOTSU or Dell Pro 14) will be far more legible and comfortable to use.
🛠️ Dual Screen Setup Guide for Students (Mac & Windows)
The true value of your portable monitor is unlocked when it’s properly configured to act as an extended, seamless workspace.
Step 1: Connecting the Monitor
- Single-Cable (Preferred): Plug a single USB-C cable from your laptop’s Thunderbolt/USB-C port directly into the monitor’s primary USB-C port. The monitor should power on and display your screen immediately.
- Dual-Cable (Required for older laptops or lack of power): Connect a video cable (HDMI/Mini-HDMI) and a separate USB-C/USB-A cable for power. Ensure both are securely attached.
Step 2: Configure Display Settings (The Critical Step)
This is where you tell your computer how to use the new screen.
For Windows Users:
- Press Windows Key + P to bring up the Project menu.
- Select “Extend” (Do NOT select “Duplicate”—that just mirrors your laptop screen).
- Go to Settings > System > Display. Your screens will be labeled ‘1’ and ‘2’. Click “Identify” to see which is which.
- Arrange Your Displays: Drag the icon for screen ‘2’ to match the physical placement of your portable monitor (e.g., if it’s on the right of your laptop, drag the icon to the right). This ensures smooth mouse movement between screens.
- Set Main Display: Click on the screen you want your taskbar and default applications to open on (usually your main laptop screen) and check the box that says “Make this my main display.”
For Mac Users:
- Go to System Settings > Displays.
- The portable monitor should appear. Click “Arrange…”
- Arrange Your Displays: Drag the portable monitor icon to match its physical location relative to your MacBook screen.
- Uncheck “Mirror Displays”: This ensures the portable monitor acts as a separate, extended desktop.
- Resolution: MacBooks use complex scaling. If the text looks too small or too large, click the monitor icon in the settings and choose a different scaled resolution. Pro-Tip: Mac users with high-resolution portable monitors often benefit from the third-party app BetterDisplay for custom resolutions.
Step 3: Optimizing Your Workflow
Once the screens are set up, here are the most productive ways to use your dual-screen setup:
| Academic Task | Screen 1 (Laptop) | Screen 2 (Portable Monitor) |
| Research Paper | Microsoft Word/Google Docs/Primary Writing App | Reference PDFs, Notes, Web Browser Tabs |
| Coding/Programming | Code Editor (VS Code, Python, etc.) | Terminal, Documentation, Testing Output |
| Online Lecture | Zoom/Video Conference App (Full Screen) | Note-Taking App (Evernote, OneNote, etc.) |
| Graphic Design | Primary Creative Canvas (Photoshop, Illustrator) | Tool Palettes, Layers Panel, Color Swatches |
The Final Verdict: Your Study Partner Awaits
A portable monitor is an academic force multiplier, giving you the screen space necessary to manage the heavy workload of college life without being tethered to a fixed desk.
- If your major requires precise color and smooth motion (design, video, gaming), the SOTSU FlipAction Pro 16″ Gen2 is an investment that will pay off in efficiency and quality.
- If your primary need is pure screen real estate on a budget for simple multitasking, the Arzopa A1/Z1RC provides the best value.
- If ultimate portability and a bright display are your top priorities for campus mobility, the Dell Pro 14 Plus is the undisputed champion.
By choosing one of these top-rated screens and following the dual-screen setup guide, you are immediately upgrading your study environment. Say goodbye to tab-switching fatigue and hello to a more focused, productive semester.
“DISCLOSURE: This post contains affiliate links. If you make a purchase through one of our links, we may earn a commission at no extra cost to you.”